
Ok I’m a convert. I’ve always shied away from shooting RAW. With every previous version of photoshop I’ve read a book, had a fiddle with it & decided I couldn’t make enough of a difference to make it worthwhile, but I’ve been completely blown away by what CS6 can do, particularly in the recovery of highlights, so every photo I take from now, even holiday snaps, will be shot using RAW.
I’ll leave the tutorials to those who are more practised at them, but here’s a couple of samples from a recent trip to Rome.


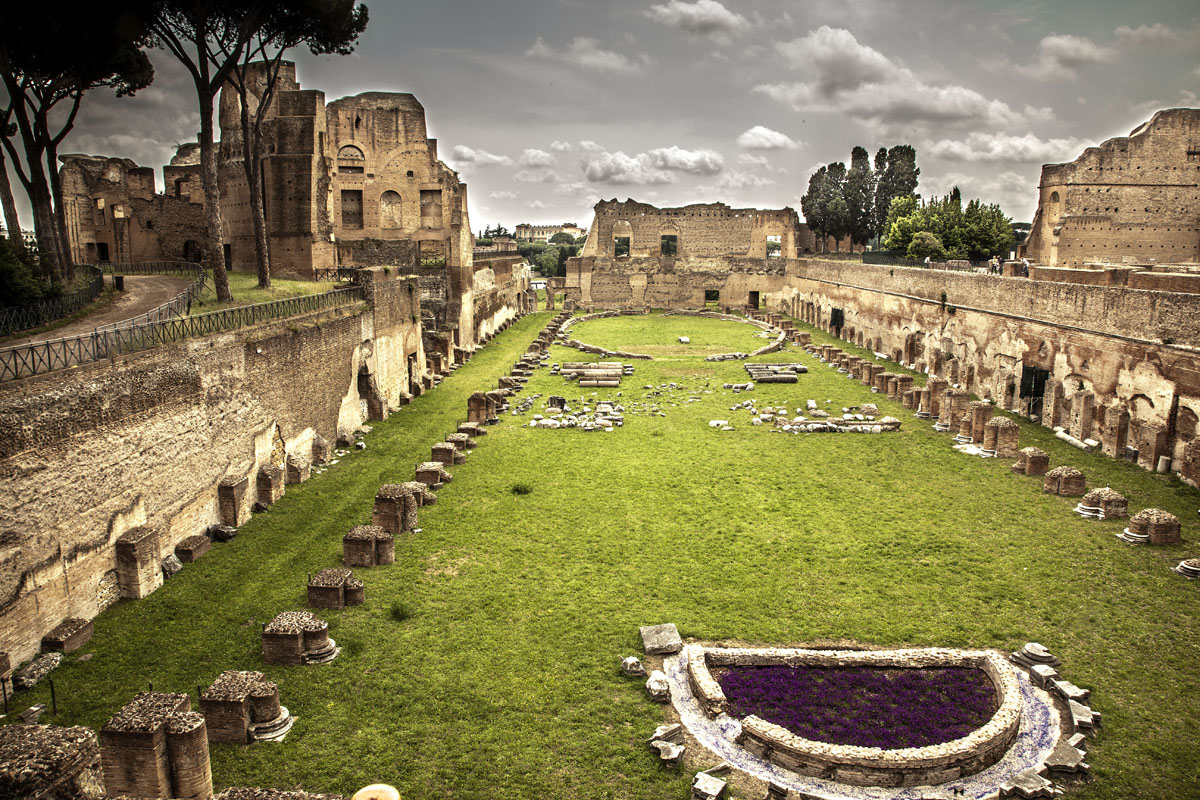
The first photo is the unprocessed version, of the Hippodrome of Domitian on the Palatine Hill. The sky is pretty dull, & everything looks a bit flat.
The second photo is the same shot after processing with Camera RAW. The amount of detail recovered in the sky is just amazing. I’ve largely used three adjustments to this shot.
Firstly, I dropped the highlights to recover detail in the sky.
Secondly, I used the fabulous adjustment brush, which allows you to paint any adjustment in to chosen areas of the photo. Here I used it to lower the exposure of the sky.
Finally, I used the Detail slider to give the hyper real effect.
There were some other minor tweakings, but it’s those three that made the difference. Here’s another example, of Trajan’s column in the Piazza de Venezia.


In this shot the sky was pretty fierce to begin with, but RAW has turned it into something a bit special.
The other great thing I’ve found so far is a noise reduction filter. I’ve always used an external plug-in as I’ve found photoshop’s noise reduction to be a bit rubbish. It still is, but the one in RAW is pretty awesome.
I’ll be spending quite a bit of time getting to grips with the new RAW over the next few weeks, I’ll keep you posted with the results.
Rome was amazing by the way, we could’ve spent a month there & not seen all the sights. Photo blog coming soon!
You must be logged in to post a comment.